Showing posts with label Finished projects. Show all posts

Saturday, January 7, 2012

Baby Quilt

Our friend Robin had a sweet little boy, Corey Scott, on December 27th.  He is adorable.

I had wanted to make a quilt for the little guy!  I started searching for a simple quilt pattern that would be great for a baby.  I was getting a little frustrated.  I found plenty of simple patterns but they were so plain.  I also wanted to use a flannel fat-quarter pack that I had so it needed to be at least a little scrappy.  

Then I found this great tutorial over at Diary of a Flutter.Kat!   It was exactly what I was looking for.  If you have never been over to her blog you should check it out!

I decided to do a 3 x 3 lay-out.  I think it turned out great!  My kids weren't sure they wanted to give it to the baby.  It is soooo soft.

I took these pictures with my phone and it almost makes the background look like an oatmeal color.
It's not, it's actually a really nice sagey green.


I heard once that the Amish always intentionally make a mistake in their quilts, because only God is perfect.  I have absolutely no idea if this is true or not but I like the idea and use it to explain my quilting screw-ups.  So we'll call this block my Amish block.
(Oopps, It was way to far in the process to fix this when I found it.)
Close up of the froggy pin wheel.  

The back!  Aren't these frogs cute!


Thanks for the Tutorial Kat!  

Monday, December 5, 2011

The Challenge

The quilt shop, The Gingerbread House, that hosts our quilt guild, peace by piece, sponsors a quilt challenge every year.  Each year Karen, the owner of The Gingerbread House, chooses a pattern, a color way, or certain fabric to be used in the challenge.  We receive the challenge at the October meeting and we have until the December meeting to submit our piece.

This year we received what Karen called, a crayon box, eight different fabrics (fat eighths) rolled up into crayons and packaged in a bag together.  The rules... We had to use each fabric.  That's it!  We could make anything, use any additional fabric, use any pattern.  We just had to use every fabric.

Now... I swear I took a picture of the crayon box and the fabric, but I can't find it!  And since my computer has died since we got it who know what happened to it!

I decided right away to make this a true challenge.  Not only did I want to meet the requirements of the challenge, but I wanted to make it a personal challenge by doing something I'd never done before.

I decided that I would make a "cross-stitch" or "postage stamp" quilt.  I found this really cute cross stitch pattern online and started to process of transferring to a grid for quilt.

I was using Excel to convert this too a quilt pattern.  So, when I lost my computer I lost this image and the excel file I was working on.  So I needed to go back to the drawing board.

I found several ideas.  I thought a bow tie would be cute.  I could do quit a few of them to make a table topper.


But this is just didn't meet the "do something I've never done" part of my personal challenge.

Then a saw a beautiful miniature quilt of falling leaves.  I thought, hmmm, that would work, I could have a background, a border, and six falling leaves.

This is not the miniature, I don't have a picture of that but you get the idea.  Right?
I felt like it met both the quilt challenge and my personal challenge.  I'd never made a miniature quilt before, nor had I ever taken a pattern and re-sized it.

I knew I had a pattern in a book somewhere so I started looking!  While I was looking I found a very different but perfect pattern.  I found it in a long forgotten book.  A friend gave it to me a number of years ago.  It has old quilt patterns "modernized".  The problem is that this was a used book she found at a garage sell, so all of the paper templates were missing.  This particular pattern basically said, cut a certain amount of template A, a certain amount of template B, and piece using photo for placement.  

Now that's a challenge!  My husband thought it would be perfect.   It shows the fabrics beautifully!  I've never done anything like this before, basically designing a quilt from a photo, using Y seams, and cutting 60 degree angles.  

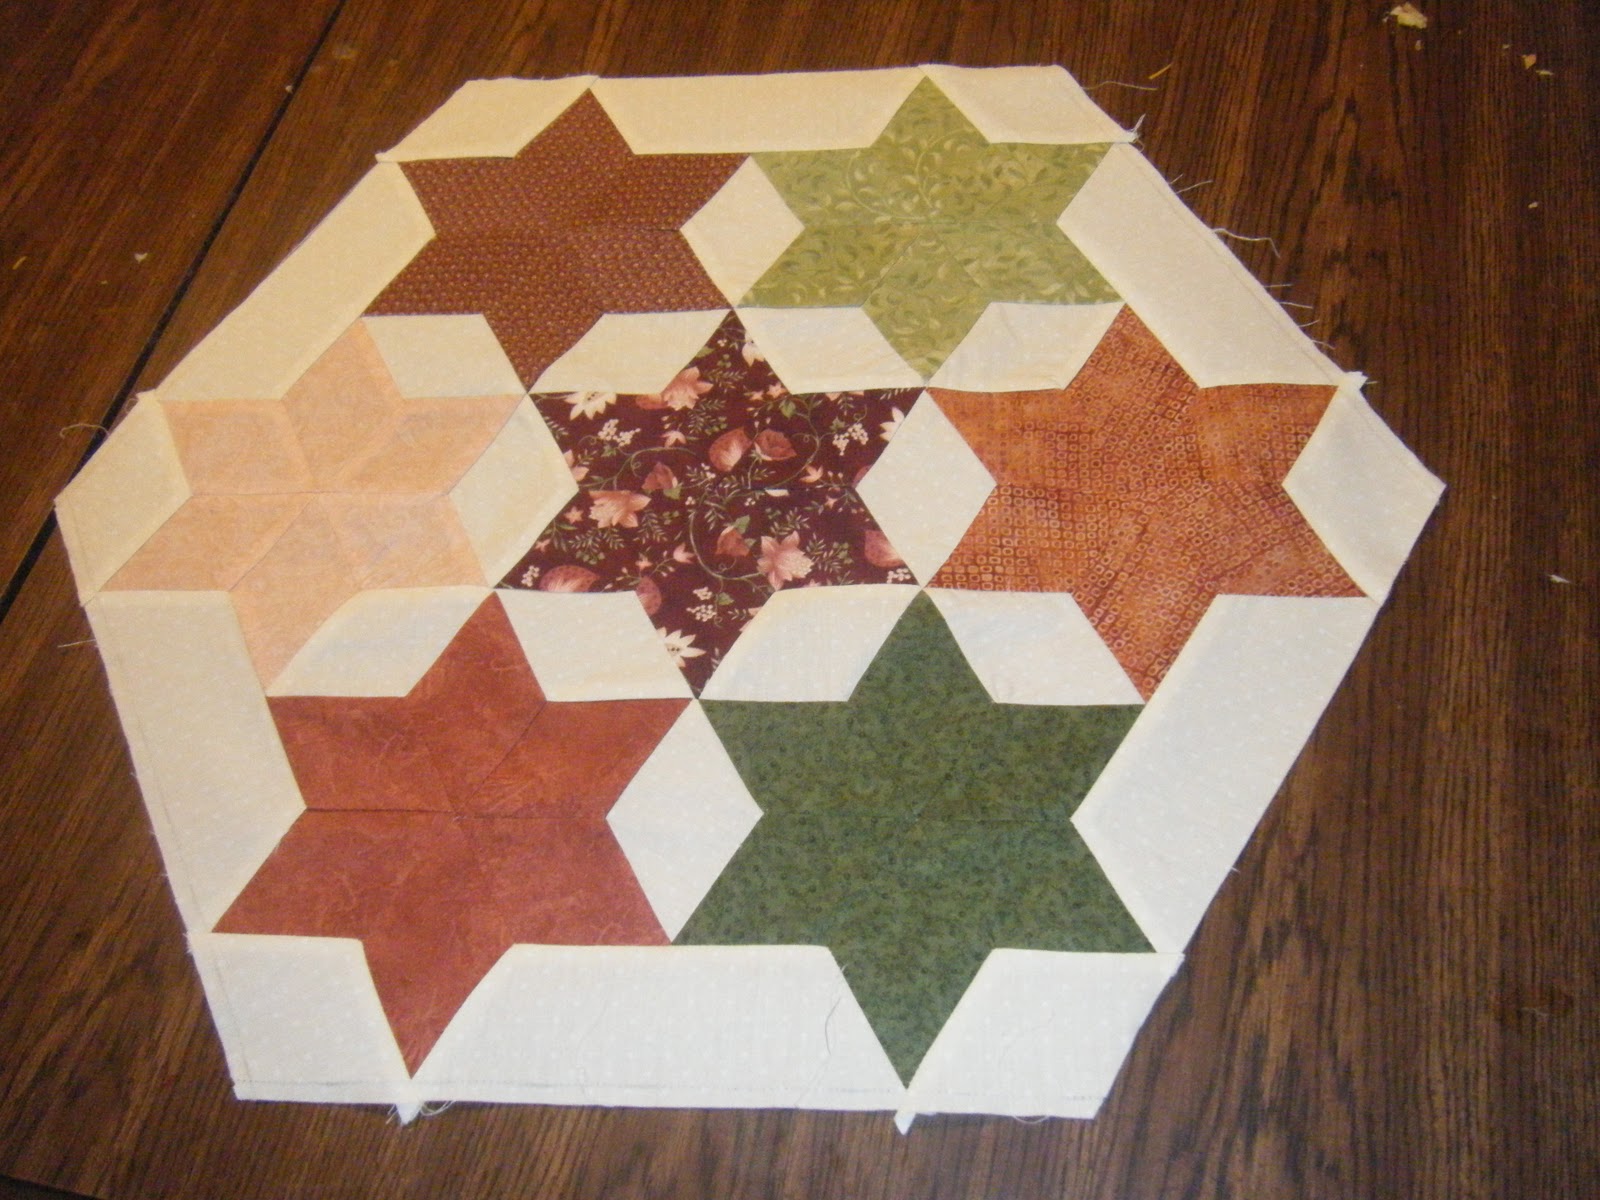
I chose to make a 7 Sisters table topper.


Here are the eight fabrics.  I am very pleased!  I think it turned out great!  I found a boarder and binding fabric from the same line as the center star.  


What ya think?  I am very happy!!!!!

I also finished my Christmas Advent Calendar.  You can find the tutorial for this one at the Moda Bake Shop.  I gave one of these to my sister, my brother, and my mom.  Their calendars actually have numbers on them.  But I didn't end up having enough for mine.  By next year I will get numbers on it!


Saturday, October 15, 2011

Another Finish

I finally finished the Race Toward the Future quilt.  It was a graduation gift for my daughters good friend.  She loved it.  She was so cute.  I missed the best picture but I still got a good one.

The quilt really isn't as wonky as it looks in this picture.  I'm not sure what happened.


Happy Girl!
I literally finished the binding four minutes before she arrived.  Talk about cutting it close.  Yikes.

I'm posting over at Fabric Tuesday!  Click on the button in the right sidebar to see the amazing fabric projects these bloggers make.

Monday, September 26, 2011

Goodie Swap Packages are on their way!

I am so excited.  I sent of both of my Goodie Swap packages this morning.  This has been so much fun.  A little intimidating and overwhelming at times but a ton of fun.  I tried somethings I've never done before.  I stepped out of my comfort zone and made my goodies from a picture I saw.  I think they turned out pretty good, not perfect, but I think they are cute.  Now I just hope my partners like them as well.

Here are pictures of the completed packages.  Each partner received a mug rug and goodie.  The goodie was a quilting totebag.  I also found this amazing idea for Molten Chocolate Cake in a cup and had to use it for this swap.  After all it is a mug rug swap, shouldn't you have a mug to use?


I am so excited!

Saturday, September 24, 2011

Goodie Swap finished

I finished all the bits for my goodie swap and will be sending them off to their new homes first thing Monday morning.  I sure hope my partners like them.  I made each partner a mug rug and for the goodie a quilt class tote.  It is large enough to hold a small cutting mat, rulers, rotary cutter, scissors, etc.  There are two pockets on the front and one on the back. 


Now I just need to gather a few little nuggets to go with these and they are off.

Friday, September 2, 2011

Dresden Flower

A few weeks ago I blogged about participated in a "Project Quilting" Flora Challenge.  At the time, I didn't finish the wall hanging I designed.  


My kids, especially CJ, love this quilt.  My husband was impressed by confused.  He really didn't get the whole wall hanging thing.  He asked me what I was going to do with such a small quilt.  When I told him it was a wall hanging he gave me the funniest look and said, "we're going to start hanging your quilts on the walls now?" I just said "Yep!  Ya like it?"  He wisely said it was beautiful. 


 Since finishing the top the quilt has just sat on my ironing board waiting for me to quilt it.  I must have looked at it a dozen times everyday.  I just couldn't seem to bring myself to finish it.  Finally I just decided to buckle down and quilt it.  While I was basting the quilt sandwich it suddenly dawned on me... my kids love the quilt, my hubby loved the quilt, the wonderful lady at my LQS loved the quilt, I just liked the quilt.  There was something that just wasn't working for me.

I got basic idea for this quilt from this video tutorial from Missouri Star Quilt Company.  (If you have never watched their videos or visited their site it is soooo worth your time.  They are one of my very favorite online shops and the have great videos.)  They used a 5 in blade in their project.  I wanted to use larger blades, and make it a double Dresden so I used an 8 in blade for the outer plate and a 5 in blade for the inner plate.  For my stem, even though you can't see it in the photos, I used a 2 in ribbon which I gathered in the center then added 1 in ric-rac on top of the ribbon. 

I finally realized it was the stem I didn't like.  It just seemed out of proportion with the flower and distracted from the amazing fabric and the over all impression of the flower.  So... I took out all the safety pins, did a lot of unstitching and repositioning and finally finished the quilt.  I did the quilting and binding and hung it on my wall (all be it with a clothes hanger cause I don't have the right hardware yet).  I love, love, love it now. 


I love the beautiful hand dyed fabrics of the flower and boarder and the batik back ground

CJ, my sweet guy, didn't agree with my choice to change the quilt top.  He still likes it but refuses to call the quilt a flower now.  He calls it the sun quilt now. 

Saturday, July 2, 2011

Brisinger


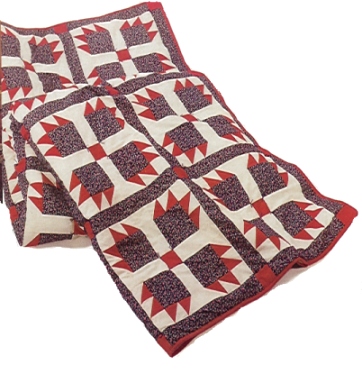
I finished my oldest son, Zachary's quilt.  I was thinking of naming it "Spinning Dragon" or "Flaming Dragon".  My long arm quilter, Jennifer Bernard at Heart's Desire Quilting, thought I should call it "Dragon's Breath"  None of those worked for Zachary.


Let me back up and tell you a little bit about my son. He is amazing. He is super smart and loves to read. he reads constantly at least when he isn't playing video games. Zachary is 14 and has long since hit the stage where he refuses to hug him mommy and has completely forgotten how cool he once thought I was. He has a very quick sense of humor and asks a million questions everyday. He has always asked tons of questions. He used to ask me for the questions, now he asks some guy named "Google". :)

Zachary loves mythology especially anything about dragons.  About two years ago we found this dragon fabric and he loved it.  He asked me if I would make it into a quilt for him.  So I bought 6 yards and told him he had to help me pick out a pattern and I would make it for him.


He started going through all of my quilt books and almost instantly fell in love with the bear paw.  Only problem... the dragons in the fabric he chose are 8 in and I couldn't figure out how to make a bear claw work with the fabric.  Finally we found an old 1930's quilt that had 16 in squares on point.


The pattern actually used a solid white fabric in the "plain" squares with very intricate quilting and red and white pinwheels.  He really liked it and was excited that the dragon fabric would be seen.  His only concern... that it wouldn't be enough red, his favorite color.  Needless to say, it has enough red.

OK, back to naming the quilt.  One of Zachary's favorite book is Eragon.  Actually, it's a series of books, called The Inheritance Series, by Christopher Paolini, and he loves them.  There are currently three with the fourth coming in November.  He has read them multiple times. 

By Christopher Paolini: Eragon (Inheritance, Book 1)  Inheritance 3-Book Hardcover Boxed Set (Eragon, Eldest, Brisingr)

The stories are all about the Dragon riders.  Brisinger is the ancient name of Fire and when a dragon rider uses the ancient name they can make fire.  Brisinger is also the name of the third book.  Zachary wanted to name his quilt "Brisinger." 

So "Brisinger" it is!


Back of "Brisinger"  I used the rest of the dragon fabric and bordered it with black, it could almost be reversible.


Close up of Jennifer's great quilting.

I knew I hit the jackpot with this one when I got Zachary's response to the finished quilt.  "Oh mom, it's so beautiful."  Then he hugged me.


I love you Zachary.

Thursday, June 23, 2011

Despite the dark cloud hanging over my head alot was accomlised today!

We never seem to catch a break around here.  There is always some new stumbling block to climb over.  I was feeling pretty overwhelmed and sorry for myself this morning.  I wanted to climb in bed, pull the covers over my head and shut the world out.  However, I had too much to do today!

My two oldest kids leave for "Trek" next week.  They are traveling some of the Mormon Handcart pioneer trail that goes through Iowa.  They will be in pioneer clothes, pulling handcarts, and hopefully getting an idea of what the Mormon Pioneers experienced.  I made a skirt and apron for Alexa.


Super easy skirt and apron.


Just need to head to Goodwill to find a long sleeve shirt for her to wear.

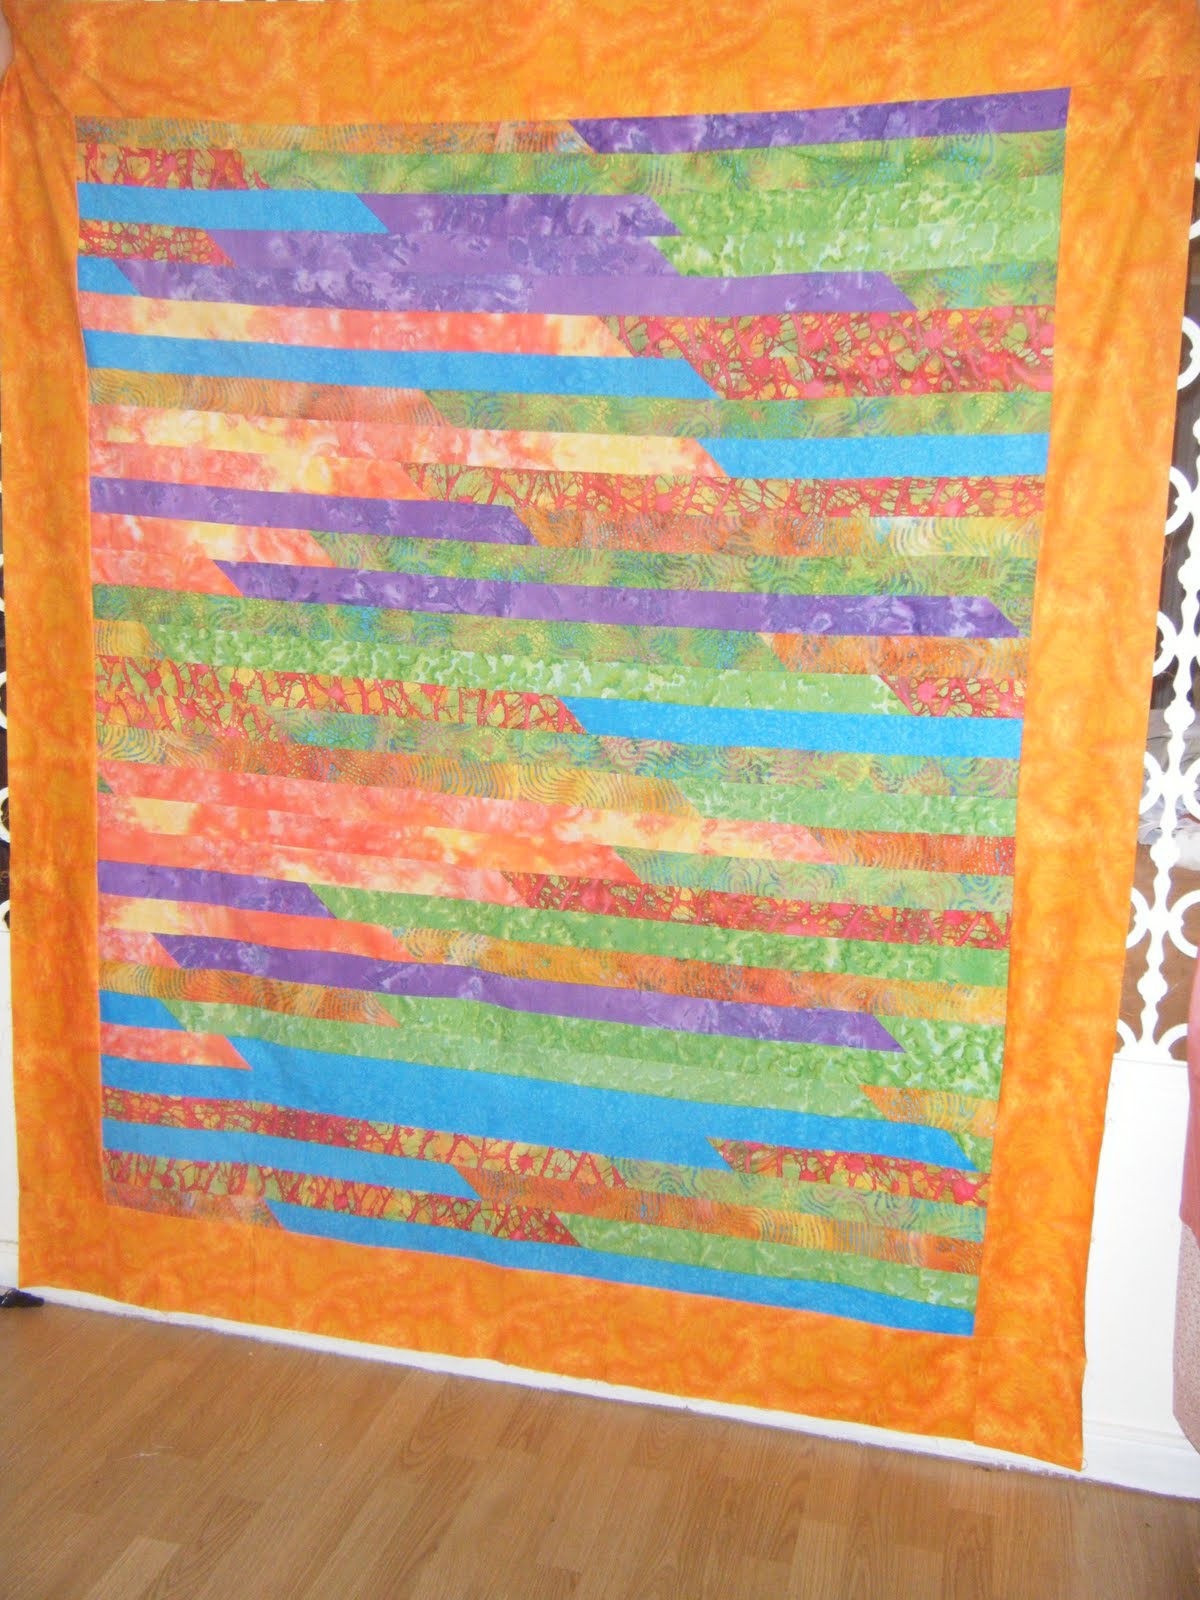
I also got the borders added to the Jelly Roll Race quilt.  In hind sight I should have taken pictures along the way and made a "how to" entry for this quilt.  It is sooooooo easy that anyone who can sew a straight stitch can make a beautiful quilt.  Maybe I'll have to make another one soon! :)


I wish my camera did a better job at the colors.  They are batiks and marbles and they are very bright and cheerful!

Tomorrow is "Finish it Friday" so I will try to get it quilted.  Maybe the binding can be next Friday's project.  I'll post it when I'm done.

All this work actually boosted my mood a bit! 


Tuesday, June 21, 2011

Measure once cut twice - Using the right set of instuctions is a good idea too!

I joined a quilting group when I moved to Iowa.  I felt like it was a good way to meet people with like interest in my new town.  It's been great.  However, since I am so rarely here, because I'm working out of town, I haven't gotten to do much with them.  But they are always so gracious and happy to see me when I am in town.  They sure are a great group of ladies.

Fair time is coming and the group puts together a sampler quilt for the 4-H group to auction.  We were each given 12 inch squares of five different fabrics.  The rules were...

1. At least four of the five fabrics had to be used.
2. No additional fabrics could be added.
3. Design could be original or from a pattern, and could be pieced, applique, or a combination.
4. No embellishments that would interfere with machine quilting.
5. Finished block needed to be 9in. (so 9 1/2 in raw).

I found this great pattern that I loved.  However, it was 12 inches finished.  No a problem, right?!?  I did the math and wrote down the new measurements for the cut pieces.  Then I went to work at the Quad Cities Nuclear plant for 7 weeks.

Well, the block is due at the end of the month so I wanted to get it finished today.  I pulled out the pattern, cut up the pieces and made a beautiful.... 12 in block.  YIKES!!!!!!!  I forgot all about the finished size thing and didn't use my adjusted measurements.

So, I did some frog sewing... (you know rip it, rip it, rip it) and got back to the nine units.  Then I did some more math and cut them down.  Here is the finished 9 in block.  It still looks pretty good.


Re-sizing the green/red/beige block was the hardest one to get right.  But I'm pretty happy with it.


Here it is again against a dark background.  I thought you would be able to see it a little better.